Category Archives: Home Maintenance

How to Handle Carpet Stains

“Ever had a spot on your carpet that you couldn’t get out?  You probably waited too long to clean it.  The key is to act fast and follow these notes depending on the type of stain.”
Denise Buck & Ed Johnson – DC Metro Realty Team
If you’ve ever had a carpet freshly cleaned or rolled out a new area rug only to watch in horror as it became a stain magnet for everything from pet accidents to spilled wine and dirty shoes, you know the feeling: part panic, part action hero that transforms even the mildest-mannered among us into grime fighters.It’s an occurrence that experts in the area of carpet care know well. In fact, when it comes to spot removal, pros like the ones at Coit carpet cleaning and the Carpet and Rug Institute (CRI) are nothing short of stain-fighting superheroes. The best part? You can be one, too. Cape optional. Here’s how.

Originally Published on HOUZZ, Bonnie McCarthy

13 Ways to Instantly Improve Curb Appeal

“Want to improve the Curb Appeal of your home, but not sure where to start?  Take a look at some of these ideas and get inspired.”

Denise Buck & Ed Johnson – DC Metro Realty Team

If you’re trying to sell your home this spring — and really, there’s no better time, according to Realtor Mag — here are some ways to increase the curb appeal of your home, attract prospective buyers and give your home an edge on the market.

1. Give the Front Door a Facelift

You want the entrance to your home to be as inviting as possible, so start by giving your front door a fresh coat of paint. What color? Try red. In feng shui, red conveys a warm welcome. And adding molding around your doorframe will give your entryway a polished look.

(Credit: Iriana Shiyan/Shutterstock)

(Credit: Iriana Shiyan/Shutterstock)

2. Update the Hardware

Don’t overlook the details. If your doorbell, door knob or door knocker is rusted or simply outdated, it can leave a poor first impression. Whether you choose brushed nickel or solid brass, modern or vintage, select a finish and style that best suits the overall aesthetic of your home.

(Credit: PhotoFixPics/Shutterstock)

(Credit: PhotoFixPics/Shutterstock)

3. Dress Up the Doorstep

Continue the warm welcome by adding potted or hanging plants for life and color. If you have a porch, add patio furniture to help homebuyers visualize enjoying the front space. And don’t forget the welcome mat for a finishing touch.

(Credit: Anna Oleksenko/Shutterstock)

(Credit: Anna Oleksenko/Shutterstock)

4. Make Over the Mailbox

Your mailbox gets plenty of use and is vulnerable to the elements, so don’t overlook it. Options include a stand-alone version or one that is attached to your home. A traditional look is timeless, or you can get more distinctive — just don’t go too crazy. Remember, you’re trying to appeal to a wide range of potential buyers).

(Credit: kitzcorner/Shutterstock)

(Credit: kitzcorner/Shutterstock)

5. Level Up on House Numbers

Your house number is an opportunity to add a distinctive accent to your home. Install decorative number plates to the face of your home or fence, or paint the numbers onto your door, decorative rocks or on the pots of an arrangement of plants. Your style options are endless; just make sure they complement your home rather than detract from it.

(Credit: Frontier Sights/Shutterstock)

(Credit: Frontier Sights/Shutterstock)

6. Install Outdoor Lighting

Yard lighting isn’t just for ambiance but for security. Buyers want to feel that their prospective home is safe, so lighting should be ample around the exterior. Add hanging lights on either side of the front door, or pole light fixtures on either side of your front stoop. Light up the walkway and/or driveway with solar-powered accent lights, and consider motion-detecting flood lights around the front and back of the house.

(Credit: photobank.ch/Shutterstock)

(Credit: photobank.ch/Shutterstock)

7. Paint the Trim

Weathered trim ages the look of your house. Fresh paint offers an instant upgrade, and as a bonus, it will draw attention to the details of your home. Select a vibrant white or a color that complements the color of your home.

(Credit: Iriana Shiyan/Shutterstock)

(Credit: Iriana Shiyan/Shutterstock)

8. Replace Gutters

If your rain gutters are detached or sagging, the best thing to do is just replace them. New gutters also signal to potential buyers that you’re good with upkeep, especially on important details that can cause water damage if neglected.

(Credit: Amy Walters/Shutterstock)

(Credit: Amy Walters/Shutterstock)

9. Pave the Way

A walkway that leads to the front door is an invitation. Brick, stepping stones or pavers provide a uniform look and are simple to lay out. Salvaged wood pallets or gravel create a rustic feel. Or get creative and pour concrete and stamp it with a design. Line your finished walkway with plants or solar lights.

(Credit: apple2499/Shutterstock)

(Credit: apple2499/Shutterstock)

10. Get an Edge

Few things detract from an otherwise beautiful home than overgrown grass and weeds. Manicure the edge of the driveway for instant polish. You can simply use an edging tool to create clean lines along your driveway, or take it a step further and add a border of decorative blocks or stones.

(Credit: pics721/Shutterstock)

(Credit: pics721/Shutterstock)

11. Build a Trellis

Create a welcoming portal by installing a trellis or arbor over the walkway leading to your home. Possible materials include reclaimed wood, bamboo or metal. Then, select a vining plant for your location and climate — helping buyers to picture their future home in full bloom.

(Credit: Hannamariah/Shutterstock)

(Credit: Hannamariah/Shutterstock)

12. Plant Trees

Trees are practical as well as decorative, and easy to plant. When choosing which varieties to plant, don’t forget to factor in its full-grown size. If there’s room, plant two trees to line your walkway.

(Credit: Hannamariah/Shutterstock)

(Credit: Hannamariah/Shutterstock)

13. Out of Sight

Cover up any eyesores around your home with clever containment. Paint electrical boxes and weathered piping. Disguise trash and recyling bins and outdoor air conditioners with a privacy screen or lattice fencing. Tuck unsightly hoses into attractive containers. These charming but simple touches will go far with prospective homebuyers who are trying to envision your house as their own.

(Credit: Naddanai Kongsima/Shutterstock)

(Credit: Naddanai Kongsima/Shutterstock)

Originally published by Pro.com on Yahoo Homes!


How to Keep Your Stainless Steel Clean

“Many of us have Stainless Steel Appliances and we’ve figured out what seems to work for cleaning them.  However here are some good tips on specific stains and the importance of being consistent in how you clean.”
Denise Buck & Ed Johnson – DC Metro Realty Team
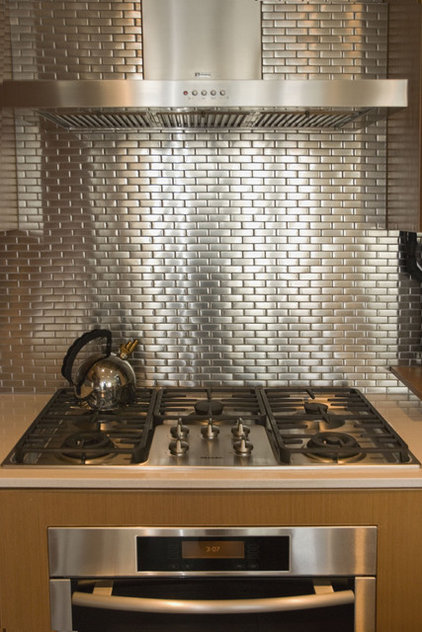
For the past few years, designers have debated whether or not stainless steel will continue to reign supreme in kitchens across America or lose its popularity to glossy black or white appliances boasting sleek, smooth finishes.While the trendsetters debate, however, millions of us continue to choose to live with the commercially cool look and functionality of stainless steel. Whether you have a little or a lot of the shiny stuff, here’s what experts suggest we do about those fingerprints, and how to care for and clean one of the hardest-working surfaces in the house.
Originally appearing on HOUZZ, by Bonnie McCarthy

Your Guide to an Organized Home

“Once a home is organized, it’s so much easier to clean and maintain.  Need some ideas on how to get started?  Here is a top to bottom look on how to get your whole house done in just a week.”
Denise Buck & Ed Johnson – DC Metro Realty Team
Clutter getting out of hand, or just feel it’s time for a deep clean? Our seven-day plans for cleaning and organizing your home, room by room, offer a flexible blueprint for bringing serenity to your space.Each plan is organized with the first few days requiring the most work, so you can get started on a weekend. This will allow you to get a jump start and finish up smaller tasks in the evenings during the week — but you can always pick and choose among tasks to better fit your needs (and your time). Jump to the room that needs the most help or start at the beginning and do them all.
As Published on HOUZZ, by Laura Gaskill

A Pantry Rescued by Lazy Susans

“Struggling with a Pantry that doesn’t really work?  Here is one simple answer that might also work for you.”
Denise Buck & Ed Johnson – DC Metro Realty Team
Decorchick's lazy susan pantry makeover

Decorchick used carousels to organize her pantry and increase storage capacity. All images in this post: Decorchick

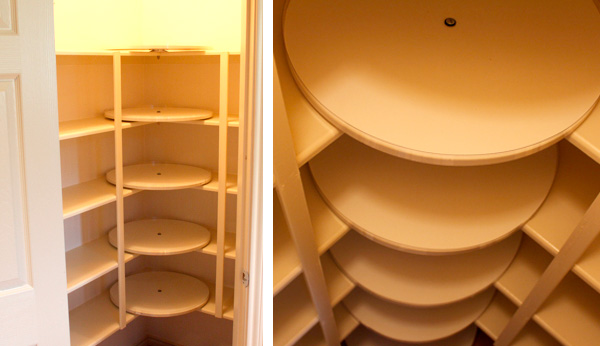
Decorchick’s pantry remodel features six lazy-Susan “carousels” that transformed her food closet from frenzied to fantastic.
“They’re the best idea ever,” says Emily, aka Decorchick. “I knew the carousels would be great. They make the pantry more organized, and that’s just what I wanted.”

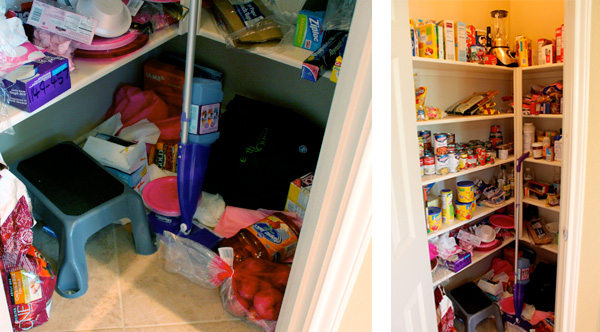
Emily’s “before” pantry was a riot of cereal boxes, peanut butter jars, baking goods, aluminum foil, and assorted canned goods. Items disappeared into the deep recesses of the corner cabinet, rarely to be seen again. And the pantry floor was a mess of onion sacks, cleaning tools, and supplies.

Before

“It was a wreck,” Emily says.

Luckily, Emily’s dad, an engineer who does woodworking as a hobby, was experimenting with making lazy Susans. A pantry solution, it seems, would be a turn of fate. Actually, six turns.

Emily and Dad installed the six homemade, 20-inch diameter lazy Susans into the center of the pantry shelves. Now, stuff that had been hard to reach is always within grasp. The carousels have been loaded with pantry items for two years, and they’re still in perfect condition.

Lazy Susans

Pretty as a Pantry

Emily wanted her pantry to look as good as it operated. Here’s how she further upgraded the space:

  • Lined the walls with paintable, faux beadboard wallpaper — fantastic! ($20 for 56 square feet)
  • Touched up shelves with paint.
  • Transferred baking and dried goods into big glass canisters, mason jars, and plastic containers ($2 to $9).
  • Identified canisters with vinyl labels ($9) marked with erasable chalk pens.
  • Spruced up the way-high space under the pantry’s 9-foot ceiling with a cheery wreath she bought at a resale shop. So why not?

Now, Emily’s pantry is a joy to behold.

After

“I wanted to get a glass door, so I could see into the pantry,” she says. “It’s just so pretty.”

Read more: http://www.houselogic.com/blog/kitchens/organization-pantry/#ixzz3hkZMokqw
Follow us: @HouseLogic on Twitter | HouseLogic on Facebook

Kitchen Designs that Work for Everyone

“Well designed and good looking Kitchens are one of the most important things that buyers are always looking for.  Knowing what will work for ‘everyone’ when designing your new Kitchen can help you when you eventually sell it in the future.”

Denise Buck & Ed Johnson – DC Metro Realty Team

Call it what you will—accessible design, aging in place, design for all—creating a kitchen that works for all ages and abilities is a good idea that adds value to your home. Kitchen designers say requests for kitchen improvements that aid independent living are increasing as the remodeling market bounces back. “You may not think you need it now, but if you’re already remodeling, do it now while you have the money,” says Paula Kennedy, a certified kitchen planner from Seattle. Here are some tips from Kennedy and other pros.

Storage

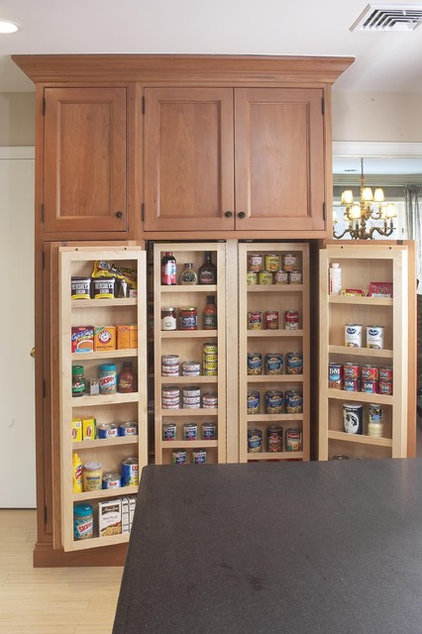
Start with storage that’s within easy reach. “The  sweet spot for everything is between 15 and 48 inches,” says Kennedy. Add slide-out units and turntables to lower cabinets and glass doors to upper cabinets so you can see what’s inside. Open shelving and easy-glide drawers are other good choices and D-shaped pulls are easier to handle than knobs.


Work spaces

Counters of different heights work for adults chopping veggies as well as for children baking cookies and cooks who prefer sitting while prepping. Consider an island with different levels—one at the typical 36 inches and another at 30. A built-in desk can double as a work surface.


Sinks and faucets

Hands-free faucets are becoming more popular and lever-style handles are easier to nudge than knobs. Add a pull-out spray for cleaning the sink and filling large cooking pots. And a shallow sink of 6 inches or so won’t swallow your dirty dishes.


Lights and outlets

For task lighting, strips of LED lights are easier on the eyes than a series of spot lights, says Kennedy. Make sure all work areas are well-lit and replace lightbulbs in hard-to-reach fixtures with long-lasting LEDs. Rocker light switches are a cinch to flip. Raise outlets off the floor from 12 inches to 18 and lower light switches from 48 inches to 42. Adding extra outlets under the edge of the counter eliminates reaching over it.


Flooring

As with any kitchen remodel, make sure you have ample floor space. A work aisle should be at least 42 inches wide for one cook and 48 inches for more than one. Select a non-skid floor that’s easy to clean. Choose a floor color that contrasts with your cabinets so the edge is easier to see.


Doorways

Normal doorways are 32 inches wide but opt for at least 36 inches, which will accommodate a stroller, a wheelchair, and your new refrigerator. Threshold-free doorways won’t trip you up and lever handles are easier to swing open.

Appliances

Plenty of today’s appliances have bright digital displays, making it easier to see time and temperature. Also consider these features:
Refrigerator. There’s no perfect configuration. Side-by-sides put most food at eye level and have a more shallow door swing. The freezer drawer of a French-door model may be too heavy for some people to open. Look for continuous door handles.
Dishwasher. Raising a dishwasher can make it easier to load but that’s an impractical solution for most kitchens because it disrupts the line of the countertop. Dishwasher drawers are another option.

Microwave. Instead of an out-of-reach, over-the-range microwave, opt for a countertop model or one built into a lower cabinet.
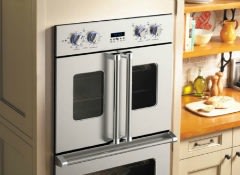
Ranges, cooktops, and wall ovens. Induction cooktops and ranges stay cool to the touch. No matter what type you have, make sure the controls are on the front to avoid reaching over hot pots and burners. Some of the latest wall ovens are being designed with doors that swing to the side instead of down, making it easier to take things in and out.

Cookware and utensils

Hand strength can be an issue for both young and old. Oxo Good Grips has built a reputation on its easy-to-manipulate kitchen gadgets and there are plenty of other ergonomic tools on the market. Invest in an electric can opener and lightweight cookware with two handles instead of one. In a pinch, an adjustable wrench can be used to open stubborn jars and pop champagne corks.

Other ways to update

For more ideas and to find help from a pro, check the websites of the National Association of Home Builders, the National Kitchen & Bath Association and the National Aging in Place Council.

–Mary H.J. Farrell (@mhjfarrell on Twitter)

Kitchen Remodeling Guide

Find everything you need to know about remodeling your kitchen including the best appliances and materials from Consumer Reports tests in the Kitchen Remodeling Guide.

Published on Yahoo! Homes

8 Great Hardware Items under $10

shopping at Lowes

“Everyone goes to either Lowe’s or Home Depot at some point during the year.  But did you know of these great items for under $10?!”

Denise Buck & Ed Johnson – DC Metro Realty Team

You might think that big-box home improvement stores like The Home Depot and Lowe’s are just for plumbing parts and plywood, but a wander down the aisles proves that these stores are a treasure trove of cheap, clever, and useful products. And we’re not just talking tools and hardware!

We checked in with some handypersons on their fave go-to buys, and asked insiders at both Home Depot and Lowe’s, to get the lowdown on the best buys at these stores. Best of all, with most of our picks under $10, they won’t break the bank!

image

Credit: The Home Depot

Homer’s All-Purpose Bucket and Accessories

“You see those orange Home Depot buckets everywhere,” says Don Mandeville, a district manager for Home Depot. “They’re only $2.97 and it’s amazing how this bucket has evolved.” The Husky Bucket Jockey ($8.78) is a water-resistant insert that fits into the 5-gallon buckets, turning it into a 30-pocket organizer. “You’ll see handymen using this, or gardeners for the yard,” says Mandeville. And the Storage Seat Organizer ($7.97) fits onto the top of the bucket, has adjustable compartments for small hardware like nails and screws, and transforms the bucket into a seat.

image

Credit: Lowe’s

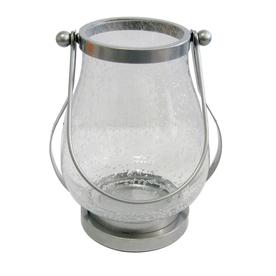
Allen + Roth Lantern

“Among my go-to items is the allen + roth Lantern,” says Suzanne Opalinski, an Orlando, Fl.-based project specialist at Lowe’s. “Not only are they decorative, but if you happen to lose power, lanterns certainly come in handy.” The clear glass lantern ($9.98) holds a standard votive and has a handle for hanging or carrying.

Contractor’s Paper

Rolls of this brown paper ($8.96 and up at Lowe’s) is used by contractors for covering floors before painting or doing construction projects, but it has myriad uses around the house. Use it as a table covering for an outdoor party or tape a length to a wall or the floors and set the kids loose with some crayons. It can even serve as wrapping paper, either plain or decorated with stamps or markers. And in the garden, a layer of it under mulch will help with weed control.

image

Credit: Lowe’s

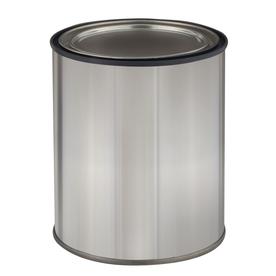
Empty Paint Cans

Did you know that you can buy empty, unlabeled paint cans? At Lowe’s, they’re only $2.68 apiece for the 1-quart sizes. Opalinski loves to use them as storage containers, lanterns, and planters, as well as to mix paint colors at home. They’d be a cute package for a gift, too!

Folding Utility Knife

The Husky Medium Folding Utility Knife comes with five replaceable blades. It’s a favorite with Ed Padilla, founder and director of theAssociation of Certified Handyman Professionals. At only $3 apiece, you can buy a bunch of them to keep in various places, such as with camping gear, your tool box, in the kitchen junk drawer, and in the car.

Loctite Power Grab Adhesive

Padilla also always stocks up on tubes of Power Grab Heavy Duty Adhesive ($4.97). For crafters or project-happy moms, it’s a more effective alternative to craft glue, since it adheres quickly to a variety of surfaces, but is repositionable for up to 15 minutes, and it dries with a clear finish. Best of all, it has a low odor so air quality won’t be affected.

image

Credit: Home Depot

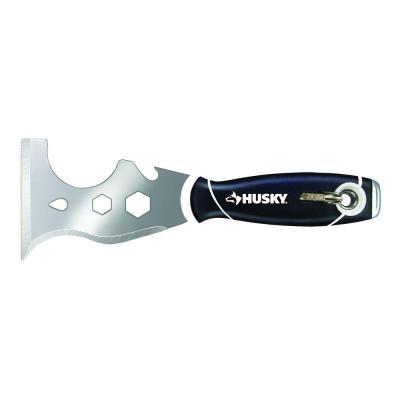
Husky 14-in-1 Tool

Multitaskers will love the numerous uses for the Husky 14-in-one tool ($5.97). “You can do everything with this!” says Mandeville. “It’s a great thing to put in your toolbox. We sell hundreds of these because they’re so versatile.”

Likwid Concepts Paintbrush and Paint Roller Covers

Anyone who’s ever painted a room knows the frustration of trying to keep a paintbrush from drying out when you get interrupted or have to stop for the day. The Paint Roller Cover and Paint Brush Cover($3.88) are an airtight enclosure for wet brushes or rollers, keeping the paint ready for the next stroke up to 30 days. “Our buyers and merchants are always looking for new technology that’s out there,” says Mandeville. “These items are from [TV show] Shark Tank.”

Originally Published on Yahoo Makers, by Jessica Harlan

9 Home Repairs You Don’t Put Off

“We all have those projects that we say to ourselves ‘We’ll take care of that later’.  Here are a few that you just don’t do that with.  Take a quick glance and make sure you haven’t put any of these off.”

Denise Buck & Ed Johnson – DC Metro Realty Team

All homeowners have a lengthy list of improvements they’d like to take care of when they have the extra money or time off from work. That’s when they’ll start taking care of them, but there’s no real hurry.

On the other hand, some household repairs can’t be postponed because they put your family in danger or may do irreparable damage to your home. Other problems get worse the longer you wait to fix them.

(Credit: Jirsak/Shutterstock)

(Credit: Jirsak/Shutterstock)

Here are repairs that should not be ignored:

1. Leaky Roof

When water continuously seeps into your home, you risk structural damage, mold, a fire if the water connects with electrical wiring or destruction of your personal property from water damage. To save money, take care of any roof leak as soon as you discover it. You may not need to replace the entire roof, but the longer you wait the more expensive the solution becomes. To fix the roof yourself, you need to trace the leak to its source which can be tricky,  and then you need to have the carpentry skills to replace shingles on a sloped surface. If you roof is in need of major repair, it could cost you on average $7,000 to hire a professional.

(Credit: stocksolutions/Shutterstock)

(Credit: stocksolutions/Shutterstock)

2. Overloaded Electrical System

Outlets or switches that feel warm, fuses that blow out frequently or flickering lights all point to too much power running through outdated electrical wiring. According to the National Fire Protection Association (NFPA), an estimated 47,700 home fires involved some type of electrical failure or malfunction in 2011 (latest figures available). A professional should diagnose and repair a faulty electrical system. You’ll need to schedule an in-person estimate for a reliable cost range for repairs.

(Credit: Africa Studio/Shutterstock)

(Credit: Africa Studio/Shutterstock)

3. Pest Infestations

Ants, termites, roaches and rodents don’t travel alone. If you see one, you can bet many others lurk just out of sight. They can eat through wood quickly until it’s unstable and structurally dangerous. Besides chewing on wood, rodents also gnaw on roofs creating leaks and chomp down on wiring, which can easily cause a fire. If you’re able to locate the pest’s entry point into your home, plug up the hole. If you have a large pest problem on your hands, you’ll need to schedule an in-person estimate for extermination costs.

(Credit: Pan Xunbin/Shutterstock)

(Credit: Pan Xunbin/Shutterstock)

4. Plumbing Leaks

All leaks, no matter what the size, need to be addressed as soon as they’re detected. They may manifest themselves as a discolored place on your wall or ceiling that grows into a leaking bulge. Besides saving your home from permanent damage, the sooner you take care of leaky faucets, cracked pipes and running toilets, the more you’ll save on your water bills. To hire a professional plumber to repair the leak, it will cost on average $300.

[ Need to make some upgrades to your home? Click to compare mortgage interest rates from multiple lenders now.]

(Credit: LoloStock/Shutterstock)

(Credit: LoloStock/Shutterstock)

5. Natural Gas Leak

Although natural gas is entirely odorless, your utility company adds mercaptan to it, which smells like rotten eggs. That helps you detect a natural gas leak, which may come from a distinguished pilot light or a broken gas main. To avoid an explosion, this needs to be repaired right away. Because of the danger involved, call 911 and they will send a gas company technician to your home. Repairs to a leak in a natural gas pipe will cost on average $450.

(Credit: olmarmar/Shutterstock)

(Credit: olmarmar/Shutterstock)

6. Foundation Cracks

As a home ages, the foundation may develop small cracks, but if you have one big enough to put a pencil into, that needs to be taken care of immediately. Just like your feet support your body, the foundation supports your house. Foundation damage can be life-threatening if stability is an issue. Water and pests can both gain entry into your home through foundation cracks. You need to consult in-person with a contractor or engineer to see if the crack can be repaired or what you need to do.

(Credit: zimmytws/Shutterstock)

(Credit: zimmytws/Shutterstock)

7. Faulty Septic Systems

If your home isn’t part of a sewer system, you have a septic tank. That’s where human waste goes into an underground container. Every two or three years the solids need to be removed from the tank by a professional. Signs that you should take action include a bad smell near the tank or a soggy area near where the tank is buried. When septic tanks get clogged or too full, that creates huge problems. You may have to start over and relocate the septic tank, which can be a very expensive. To get an accurate cost estimate, you’ll need to schedule an in-person visit with a professional.
(Credit: Jo Ann Snover/Shutterstock)

(Credit: Jo Ann Snover/Shutterstock)

8. Clean Your Chimney

Creosote builds up, birds make nests and other debris gets into your chimney. If it’s not cleaned once a year, you risk carbon monoxide poisoning or a fire. You save thousands of dollars by hiring a chimney sweep and preventing your family from becoming sick and eliminating any chance of fire. To hire a professional chimney sweeper, it will cost on average $230.

(Credit: Christine Langer-Pueschel/Shutterstock)

(Credit: Christine Langer-Pueschel/Shutterstock)

9. Plugged or Broken Gutters

Water pooling around the house may mean the gutters need cleaning or it can mean the gutter is broken or not tightly connected to the downspout. If this repair is postponed, water can get into your basement and cause rot and mold, which can be very expensive to repair. Water can also seep under your siding and cause rot. To hire a professional to repair any cracks in your gutters, it will cost on average $170.

(Credit: Roman Tsubin/Shutterstock)

(Credit: Roman Tsubin/Shutterstock)


How to Prepare for a Power Loss

“If you haven’t already had power go out this Summer, than you probably need a little reminder of what to have in preparation for a big storm.  Much of this you can do anytime of the year, but it will really come in handy in the Winter when you have more warning.”
Denise Buck & Ed Johnson – DC Metro Realty Team
You probably know the ominous feeling: As a storm or hurricane sweeps through your community, you’re huddled safe at home or in a nearby shelter … and without warning, the lights all flicker and die. You’ve lost power, and experience says it could be a while before you get it back. What do you do now?

If you’re one of the lucky folks who has a generator, the going won’t be so bad, and you can live in relative comfort until the power’s back on. But generators can be expensive, beyond the reach of many of us. If a storm is coming and you could be facing days or even weeks without electricity, these steps can help you make it through.

Originally published on HOUZZ by Lisa Frederick, HOUZZ Contributor

Fireplace and Chimney Maintenance

Chimney“Fireplaces and Chimneys are something we tend to take for granted.  Their not electronic, so they don’t get glitchy, and since we don’t use them everyday, it’s a bit of ‘out of sight, out of mind’.  But when not maintained and working properly can become expensive to to fix and quite dangerous…we’re talking fire here folks!”

Denise Buck & Ed Johnson – DC Metro Realty Team

Your fireplace, the most low-tech piece of equipment in your house, may seem like a simple load-and-light operation, but ignoring annual maintenance can impair its performance, leading to heated air (and dollars) blowing out the chimney, harmful smoke inside, and possibly even a chimney fire.

The average number of annual U.S. home fires caused by fireplace, chimney, and chimney connectors between 2003 and 2005 was 25,100, and the average costs for those fires was $126.1 million, based on the most recent statistics from the Chimney Safety Institute of America. That’s roughly $5,024 in damage per home. Annual chimney maintenance removes flammable creosote, the major cause of chimney fires, and identifies other performance problems.

Is it worth the $205 fee, two-hour service call, and all that ash possibly blackening your carpet? Here’s what you need to know to decide.

Annual inspections keep flames burning right

Creosote — combustible, tar-like droplets — is a natural byproduct of burning wood. The more wood you burn, the wetter or greener the wood, and the more often you restrict airflow by keeping your fireplace doors closed or your damper barely open, the more creosote is produced.

Soot build-up, while not flammable, can hamper venting. One half-inch of soot can restrict airflow 17% in a masonry chimney and 30% in a factory-built unit, according to the CSIA. Soot is also aggressively acidic and can damage the inside of your chimney.

The more creosote and soot, the more likely you are to see signs of chimney fire — loud popping, dense smoke, or even flames shooting out the top of your chimney into the sky. Chimney fires damage the structure of your chimney and can provide a route for the fire to jump to the frame of your house.

“If the chimney is properly maintained, you’ll never have a chimney fire,” says Ashley Eldridge, the education director of the CSIA.

The best way to ensure your chimney isn’t an oil slick waiting to ignite? Get it inspected.

Three inspection levels let you choose what you need

A level-one inspection includes a visual check of the fireplace and chimney without any special equipment or climbing up on the roof. The inspector comes to your house with a flashlight, looks for damage, obstructions, creosote build-up, and soot, and tells you if you need a sweep. If so, he’ll grab his brushes, extension poles, and vacuum, and do it on the spot.

“You should have it inspected every year to determine if it needs to be swept. An annual inspection will also cover you if the neighbor’s children have thrown a basketball in it, or a bird has built a nest,” says Eldridge.

A level one typically runs about $125. Add a sweep, and you’re talking another $80, or about $205 for both services, according to CSIA.

Consider a level-two inspection if you’ve experienced a dramatic weather event, like a tornado or hurricane; if you’ve made a major change to your fireplace; or bought a new house. This includes a level-one investigation, plus the inspector’s time to visit the roof, attic, and crawl space in search of disrepair. It concludes with a sweep, if necessary, and information on what repair is needed. The price will depend on the situation.

A level three inspection is considered “destructive and intrusive” and can resemble a demolition job. It may involve tearing down and rebuilding walls and your chimney, and is usually done after a chimney fire. The cost will depend on the situation.

Small steps can improve your fireplace’s efficiency

Besides the annual sweep, improve your fireplace’s functioning with responsible use.

  • Only burn dry, cured wood — logs that have been split, stacked, and dried for eight to 12 months. Cover your log pile on top, but leave the sides open for air flow. Hardwoods such as hickory, white oak, beech, sugar maple, and white ash burn longest, though dry firewood is more important than the species. Less dense woods like spruce or white pine burn well if sufficiently dry, but you’ll need to add more wood to your fire more often, according to CSIA.
  • Wood, only wood! Crates, lumber, construction scraps, painted wood, or other treated wood releases chemicals into your home, compromising your air quality. Log starters are fine for getting your fire going, but they burn very hot; generally only use one at a time.
  • Close your damper when not using the fireplace to prevent warm indoor air — and the dollars you’re spending to heat it — from rushing up the chimney.
  • On a factory-built, prefab wood-burning fireplace, keep bifold glass doors open when burning a fire to allow heat to get into the room.
  • Have a chimney cap installed to prevent objects, rain, and snow from falling into your chimney and to reduce downdrafts. The caps have side vents so smoke escapes. A chimney sweep usually provides and can install a stainless steel cap, which is better than a galvanized metal one available at most home improvement retailers because it won’t rust, says Anthony Drago, manager of Ashleigh’s Hearth and Home in Poughkeepsie, N.Y.
  • Replace a poorly sealing damper to prevent heat loss. “You can get a top-mounted damper that functions as a rain cap, too, an improvement over the traditional damper because it provides a tighter closure,” says CSIA’s Eldridge.
  • Install carbon monoxide detectors and smoke detectors in your house — near the fireplace as well as in bedroom areas.
  • If you burn more than three cords of wood annually, get your chimney cleaned twice a year. A cord is 4-feet high, by 4-feet wide, by 8-feet long, or the amount that would fill two full-size pick-up trucks.
  • To burn fire safely, build it slowly, adding more wood as it heats and keeping your damper completely open to increase draw in the early stages. Burn the fire hot, at least occasionally—with the damper all the way open to help prevent smoke from lingering the fireplace and creosote from developing.

By the way, fireplaces aren’t officially rated for energy efficiency because they’re so varied. Depending on the source of information, they can be 10% to 30% efficient in converting fuel to heat.

No inspection will turn a masonry or factory-built fireplace into a furnace, but it can improve efficiency somewhat, decrease the amount of heating dollars you’re sending up the chimney, and increase your enjoyment of your hearth time by reducing smoke. If a sweeping prevents a chimney fire, you’re talking about the difference between another ordinary January day, and the potential loss of your home, or even life.

Originally published on House Logic, by Wendy Paris

Read more: http://www.houselogic.com/home-advice/fireplaces-chimneys/chimney-safety-and-maintenance/#ixzz3fORjcHcJ
Follow us: @HouseLogic on Twitter | HouseLogic on Facebook