Tag Archives: Home Repairs

How to Clean Your Air Conditioner’s Condensate Drain Line

“OMG…If only we had been following these tips in the past.  Please take a look at how to do this and avoid a clog with water everywhere.”

Denise Buck & Ed Johnson – DC Metro Realty Team

Taking the time to clean your air conditioner’s drain line (or the condensate line) can have a great positive effect on how efficiently your system runs. Here’s how to quickly and safely prevent problems with your unit.


If you’ve ever taken a good look at your air conditioning unit, you may have noticed a small dripping line on the outside. This is the condensate drain, which plays an important role in removing condensation produced by your air conditioner’s evaporator coil. If the line isn’t properly cleaned, algae and mold can grow inside and clog the drain, causing elevated humidity, musty odors and water damage inside your home.

Unfortunately, this part of the system is often overlooked during regular A/C maintenance. Even HVAC technicians may forget to clean the drain during a regular service call, which means that it’s up to you to check and clean the condensate pan and drain line before a problem develops. Cleaning the line will remove clogs and blockages and prevent algae and mold from growing.

Looking to purchase a home warranty plan, view:
– What is a Home Warranty
– Compare Home Warranty Coverage
– See what Home Appliances are Covered

You will need these items to clean your A/C condensate drain:

  • Rags
  • A wet/dry vacuum
  • Distilled vinegar
  • A funnel


How to Clean Your Air Conditioner Drain

1. Turn off the power to your HVAC system at the thermostat and at the breaker.

2. If you have an indoor air handler in your attic or utility closet, you’ll need to find the condensate pan. This is usually located directly under the unit. It may also be covered by a removable access panel.

3. If you see standing water in the drain pan, your drain line is probably clogged. Use a handheld or shop vacuum to remove the moisture. You can also use rags to soak up the water. At this point, you can clean the drain pan with soap.

4. Generally, clogged drains can be cleared with suction. If you have a shop vacuum, use it to pull the clog through the drain opening, which is located outside your house near the foundation. Place your hand around the pipe to improve suction and allow the vacuum to run for a minute. Then, check the vacuum canister to see if the clog was successfully removed.

5. Next, you’ll need to identify the access point on the drain line. Usually, the drain will have a T-shaped vent with a PVC cover. Remove the cover and inspect the drain. Use this port to flush the drain with distilled vinegar. If you don’t like the odor, you can use peroxide to gently bubble away the remaining debris. Alternately, you can use hot water and a drop of dish liquid.

6. Allow the solution to sit for 30 minutes. Complete the cleaning by flushing the pipe with water. Have a helper watch the pipe outside and tell you if the water is running freely.

If you don’t have a shop vacuum, you can use a piece of surgical tubing to free the blockage. Know that this method doesn’t work well if your drain line has sharp turns that are prone to clogs. If your system doesn’t have an access vent, use the opening on the edge of the drain pan. This fitting can be removed to improve access.

Underlying problems with the system can also be responsible for compromised water flow. If the pan and drain line aren’t slightly tilted, water can build up in the back of the pan and will eventually overflow. Many newer systems are equipped with overflow sensors installed within the pipe.

If you’re unable to clean your air conditioner’s drain line, call a local professional. They can clean the line and install an access vent, if necessary. Check the drain line periodically throughout the cooling season to ensure that condensation is being removed properly.

Routine maintenance steps like checking your drain line can help keep your air conditioner running more efficiently. If you find that your system is in need of repair, remember that an American Home Shield Home Warranty could help protect your budget from costs associated with getting your unit back on track.

4 Ways to Erase Ugly Scratches From Wood Floors

“Now that you’ve finished your Spring Cleaning you’re realizing there are some scuffs and scratches on your hardwood floors.  What’s the best way to take care of them?”

Denise Buck & Ed Johnson – DC Metro Realty Team

Visit houselogic.com for more articles like this.

Copyright 2018 NATIONAL ASSOCIATION OF REALTORS®

To-Dos: Your June Home Checklist

“Summer is almost here (June 21st) and there are always things to get done in preparation for the warmest months of the year.  Take a look and see which items might make a big difference in your enjoyment.”

Denise Buck & Ed Johnson – DC Metro Realty Team


Pick the Perfect Paint Sheen for Every Room

“Painting can make a huge impact on a room, but did you realize that the Sheen you pick can as well?  See what Consumer Reports has to say.”

Denise Buck & Ed Johnson – DC Metro Realty Team

Light and traffic are just two things you should consider

There’s a lot more to choosing an interior paint than picking a color. You have to consider the hues of the furniture and flooring, and the amount of light a room gets makes a difference, too. Picking a paint that’s too shiny can reflect too much light, and one that’s too flat might appear dull.

MORE ON PAINT

It’s the paint sheen, or finish, that affects how the color appears. And that depends on whether it absorbs light or reflects it. In addition, for paint to hold up well over time, it has to be durable enough for the surface and the situation.

Here is Consumer Reports’ guide to paint sheens from the least to most shiny, and a breakdown of which ones work best in particular parts of the house.

Flat and Matte

Flat paint has a nonreflective finish and matte is low luster. A paint brand usually offers one or the other. Both help hide imperfections on the surface. “But these finishes are the least resistant to stains,” says Rico de Paz, the engineer who oversees CR’s tests of paints and stains. “And although many did well in our mildew-resistance tests, the other finishes generally performed better.”

Best uses: Ceilings, living rooms, bedrooms, and anyplace with little wear and tear or where messy splatters are uncommon.

Eggshell and Satin

For a softer look, choose eggshell. “Satin is slightly shinier, and both are easier to clean than flat or matte paint,” says de Paz. You’ll find that some paint lines offer both eggshell and satin. These sheens tend to accentuate surface imperfections, so take time prepping, getting the walls as smooth as possible. Scrape away cracked or peeling paint with a metal putty knife. And use it to remove bumps, dried-on paint, and the raised edges around nail holes.

Best uses: Eggshell can be used in the family room, living room, bedrooms, and hallways. Satin works well in those rooms, too—anywhere, really—and in the kitchen, dining area, children’s bedrooms, bathrooms, and hallways. Many satin finishes are tough and can be used on both walls and trim.


Satin/Eggshell: Great for High-Traffic Areas

The easy-clean satin finish is ideal for places where there’s lots of activity, such as family rooms, entries, and hallways.

PHOTO: TRIA GIOVAN/GAP INTERIORS

Semigloss

“The most lustrous of this group, semigloss paints typically resist stains better than the other finishes and are easy to clean,” says de Paz. Very smooth surfaces are a must.

Best uses: Trim, windows, and doors. For walls that are in great condition, consider semigloss for a kid’s room, the kitchen, and bathrooms if you don’t mind the shine.

Best and Worst Paints

Our Paint Buying Guide is a good primer, and see our interior paint ratings of 21 lines. Prices range from $17 to $70 per gallon—and paying more doesn’t necessarily get you a better paint. Because years of testing showed us that a paint line’s various finishes perform similarly overall, we’ve combined the scores into one to make it easier for you to shop.  

How to Maintain Your Water Heater to Save You Money in the Long Run

“Hot Water Heaters are expensive to replace.  Take a few extra steps to help make them last longer.  We’ve actually started getting ours drained each Spring now, hopefully that will help!”

Denise Buck & Ed Johnson – DC Metro Realty Team

Making water heater maintenance a habit will help extend the life of this appliance and reduce costly repairs. Learn how easy it is to maintain with tips from plumbing professionals.

Adjusting water heater

Replacing a water heater can be expensive and inconvenient.  To help extend the life of this important household appliance and to help it run more efficiently and economically, routine maintenance is important.  Matt Lindsay of The Lindsay Company in Houston, Texas, says that to help your water heater operate better and last longer, it’s best to start maintenance activities within the first year of a unit’s operation.

“We recommend checking the temperature and pressure relief valve every year and replacing it every three years,” Lindsay says.  “This is important because the valve is a key safety feature on the water heater.”

Keeping the water heater set at the correct temperature is also important, according to Lindsay. “Most manufacturers recommend keeping the temperature set below 120 degrees Fahrenheit on water heaters,” he says. “This is for safety and efficiency, and it helps keep energy bills low, too.”

Lindsay says that it’s also recommended to drain the water heater regularly to prevent sediment from forming inside the tank.  “A water heater tank should be drained every year,” he says. “A helpful way to remember is to drain it every year when you check the temperature and pressure relief valve.”

When sediment builds, it can accumulate as the water heats and form a ball inside the tank.  “Sometimes the sediment can collect to the size of a golf ball and will bang around inside and make noise,” Lindsay explains. “It can accumulate to a size that can’t be drained.”

Draining a tank doesn’t have to be done by a professional plumber and can be a DIY task, but Lindsay says that homeowners should carefully read their water heater’s manufacturer’s directions and follow the specific instructions for their unit.  While the directions for your unit may vary or the order of steps may be different, Lindsay says that these are some of the basic steps you might expect:

(Be sure to wear appropriate safety equipment, such as heavy gloves and goggles.)

  • Turn off the gas or electricity to the water heater.
  • Hook up a garden hose to the boiler drain, which is usually found on the bottom of the unit.
  • Open the boiler drain for about 10 minutes into a tub or directed outside the home.
  • Shut off the valve to the boiler drain.
  • Shut off the main cold water supply, which is usually found on the unit’s top right.
  • Open the relief valve, which can usually be located on the top third of the unit on the right.
  • Open the hot water tub faucet.
  • At this point, the water heater should start draining.
  • After the water has drained, open the cold water valve again.
  • Flush the unit one more time for about five minutes.
  • Close the boiler drain.
  • Fill up the water heater until no air is released from the tub or shower valve, whichever is open.

An American Home Shield® Home Warranty Systems Plan can help protect water heater components, as well as other key home systems, from covered malfunctions.  An AHS Home Warranty is a one-year service contract that covers the repair or replacement of many home systems and appliances that break down over time due to normal wear and tear.

Originally Appearing on American Home Shield (AHS.com)

Energy Tips for Daylight Savings Time

“Now that we have ‘Sprung Forward’, it’s time to take advantage of this time of the year.  Use this annual event as a reminder of things to do before the weather gets warmer.”

Denise Buck & Ed Johnson – DC Metro Realty Team


Energy Tips for Daylight Saving Time

As the days get longer and the weather gets warmer, your energy bill gets bigger. Take advantage of these tips to reduce the energy consumed in your home as spring and summer approach.

Photo by: American Home Shield

Daylight Saving Time will be here before you know it. With it comes longer, hotter days that can drastically affect your energy bill. Here are some creative tips to help you save money for the spring and summer months ahead.

Take Advantage of the Extra Sun

Natural light is a great way to reduce your energy costs. Instead of hiding behind closed blinds, open them up and let the sunlight brighten your home. When your air conditioner is on, keep your blinds closed during the day to lower the temperature of your home.

Keep Your Cool

Find your threshold for cool air and set the temperature accordingly. As a basis, 78˚ when you’re at home and 85˚ when you’re not is a good way to lower costs. Also, to maximize the effectiveness of your unit, don’t forget to change your air filters and clear any vent blockages.

Fans Are Your Friends

One of the biggest contributors to your energy bill is your air conditioner. Turn it off completely and cool down your home with window, ceiling and whole-house fans for big savings.

Turn Down the Heat

Water heaters account for about 18% of your home energy costs. Lowering the temperature on your unit to around 120˚ will help reduce how much energy it consumes.

Seal Your House

Weather stripping, caulking windows and sealing air leaks will keep the cold air in and the hot air out. This trick will benefit your heating costs in the cold winter months as well.

Strategically Run Your Appliances

Running the dishwasher and dryer during the day increases the temperature of your home. Wait until the sun goes down to do the dishes and laundry so your air conditioner won’t have to work as hard to cool your home. Washing your clothes in cold water helps lower costs, as does unplugging electronics when they aren’t in use.

Fire Up the Grill

Need an excuse to spend more time manning the BBQ? Grilling outdoors, as opposed to using your oven, also reduces the heat of your home.

Sources:
Pacific Power
Energy.Gov

Originally published by American Home Sheild

7 Hot Home Trends That Make Your Home Work for You

“Getting the most out of your home is important. Making a few small changes can make it ‘work’ better for you and will appeal to future buyers when you go to sell.”

Denise Buck & Ed Johnson – DC Metro Realty Team

Visit houselogic.com for more articles like this.

Copyright 2018 NATIONAL ASSOCIATION OF REALTORS®

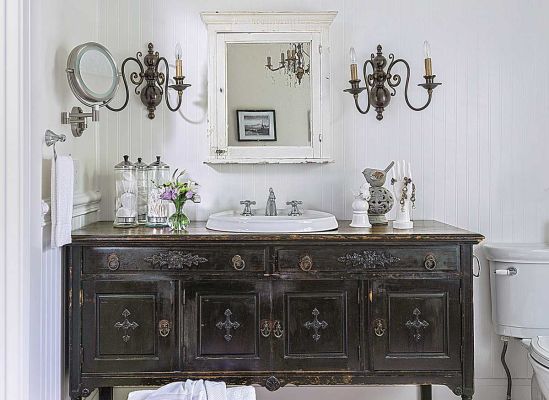
Before and After: 9 Small Bathroom Transformations That WOW

“Remodeling a Small Bathroom can be a challenge since you really don’t have much to work with.  These examples might just help you out.”

Denise Buck & Ed Johnson – DC Metro Realty Team


3 Best Light Bulbs for Your Household Appliances

“Using the right light bulb can make a difference, especially in your kitchen appliances.  Get it right the first time.”

Denise Buck & Ed Johnson – DC Metro Realty Team

Different light bulbs can impact how your appliances work. Learn about the differences and what will work best for each of your household appliances.

Photo by: Shutterstock

When the light in your oven or refrigerator goes out it can be tempting to use whatever light bulb you have on hand. But that’s actually not the best decision. Appliances require smaller-profile bulbs that are specially made to withstand heat and that contain rugged filaments made to endure vibrations from opening and closing the doors on the appliance. It’s also important to use bulbs with the recommended wattage and the proper base size. Ovens, microwave ovens, ranges, range hoods, refrigerators, freezers and dryers are among the appliances that require these special bulbs.

Incandescent bulbs, halogen lamps and compact fluorescent lamps (CFL) are most often used in home appliances. Here’s how they work:

Incandescent Light Bulbs

Incandescent bulbs

• Contain a tungsten filament
• Electric current heats filament to produce light
• Usually contain a stem or glass mount at the base to prevent air leaks
• Stem embedded with small wires to support the filament
• Vacuum or inert gas protects filament from evaporating
Halogen Light Bulbs

Halogen lamp

• Functions similarly to an incandescent lamp
• Employs the halogen cycle
• Halogen gas helps redeposit tungsten onto the filament for longer bulb life
Compact Fluorescent Light

Compact fluorescent lamps (CFL)

• Electricity is emitted from cathodes that excite mercury vapor (inelastic scattering)
• Glass envelope contains phosphors and a noble gas (e.g., argon)
• Mercury atoms produce ultraviolet (UV) light, causing phosphors to glow and produce light

Some bulbs can be used in more than one type of appliance.

For instance, a 40-watt (incandescent) appliance bulb may be the same bulb used in your oven and your range hood.

Here are some of the bulbs that can be used in various appliances.

Oven: Many ovens require 15-watt tubular halogen lamps while others require a 40-watt appliance bulb.

Microwave oven: These often require a 25-watt T7 microwave light bulb. It has an intermediate base and sometimes is used in ranges and sewing machines.

Refrigerator: Usually takes a 25- to 40-watt standard base appliance bulb, but some refrigerators use a T8 intermediate base bulb.

Dryer: Most dryers use a 10-watt, 120-volt C7 bulb.

In 2012, manufacturers and retailers began phasing in bulbs that meet the standards required by the Energy Independence and Security Act (EISA), passed by Congress in 2007. The law requires higher efficiency standards for basic light bulbs, but it doesn’t apply to all specialty bulbs. Appliance bulbs are among those that are exempt.

Before you head out to the hardware store to purchase replacement bulbs, we suggest you take a minute to check the appliance owner’s manual to find out which bulb is recommended by the manufacturer. If you no longer own the manual, you can likely find the manual online on the manufacturer’s website by entering the model number of the appliance you own.

Originally appearing on American Home Shield

How to Refresh Your Kitchen on Any Budget

“We spend so much time in our Kitchens, it’s easy to understand why you would be ready for a change.  Fortunately, you can freshen it up on just about any budget”

Denise Buck & Ed Johnson – DC Metro Realty Team